 |
 |
- FAQ's 100 Questions
- Best Puzzle Brands
- Activities/Accessories
- Best Puzzle Lights
- Sponsored Reviews
- Sales l Giveaways
- Reap the Benefits
- Get Your Game On!
We are a participant in the Amazon Services LLC Associates Program, an affiliate advertising program designed to provide a means for us to earn fees by linking to Amazon.com and affiliated sites. Also, some of our posts contain other affiliate links and we will be compensated if you make a purchase after clicking on our links.


Lego Grand Piano
Could this Lego Grand Piano be a puzzle? Maybe not but I am going assemble it that way and approach the process in the same manner I do with a jigsaw puzzle. It has 3,662 pieces and uses an APP to play a selection of music that moves the piano keys.
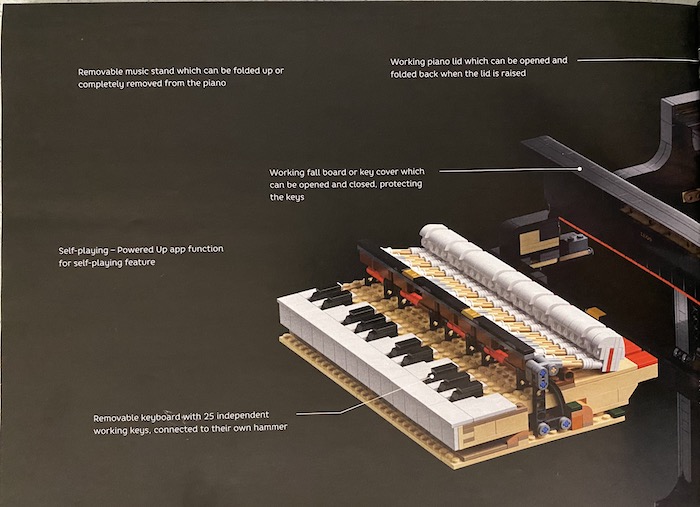
This product comes packaged in 21 Sections with a 563 page manual. It has a removable 25-key keyboard, authentic hammer action, moving dampers and pedal, motor to make the piano keys move and an adjustable height piano bench. The box weighs about 13lbs so we'll discover how much the overall weight of the actual Grand Piano is when assembled.
The piano measures over 8.5” (22.5cm) high, 12” (30.5cm) wide and 13.5” (35.5cm) deep when closed.
Read the entire review in the following Flipbook or complete article below.
Grand Piano Section One and Introduction
The following video is screen shots of all the photos entailed with Section One Assembly and images from the Manual. By watching it, you will see a shorted review without any comments or text. The text follows below the video. There are more photos from the Grand Piano Manual further below the Sections.
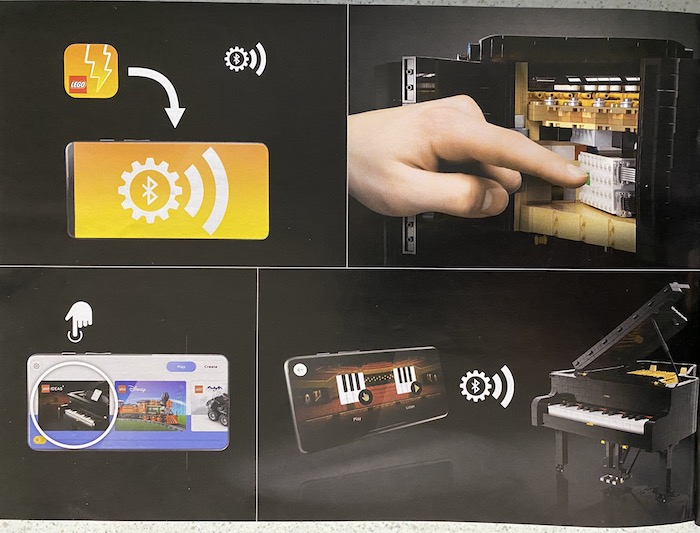
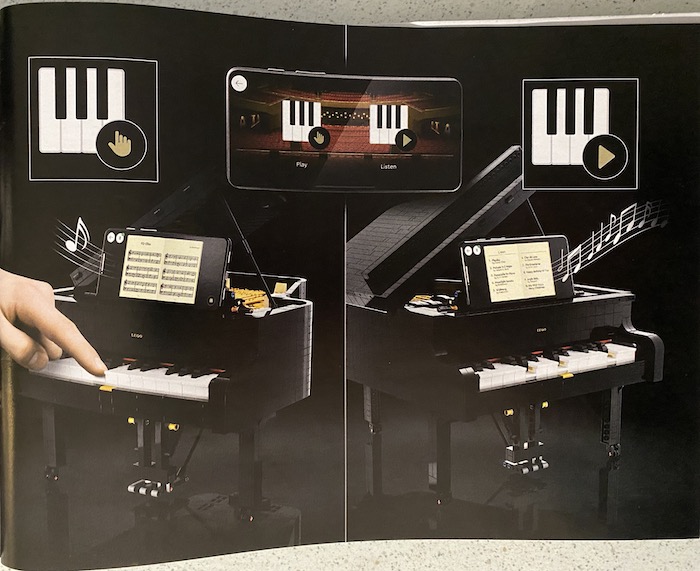
The Grand Piano uses the LEGO Powered Up app, you can play a tune yourself or automatically let the APP run through the songs available on the APP. There will be more details on that later.
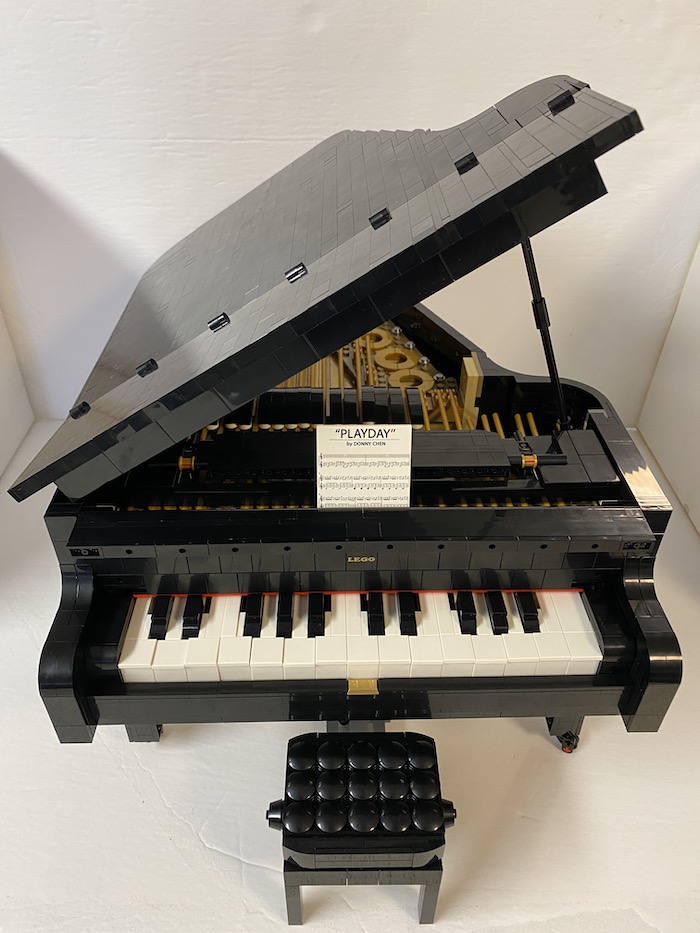
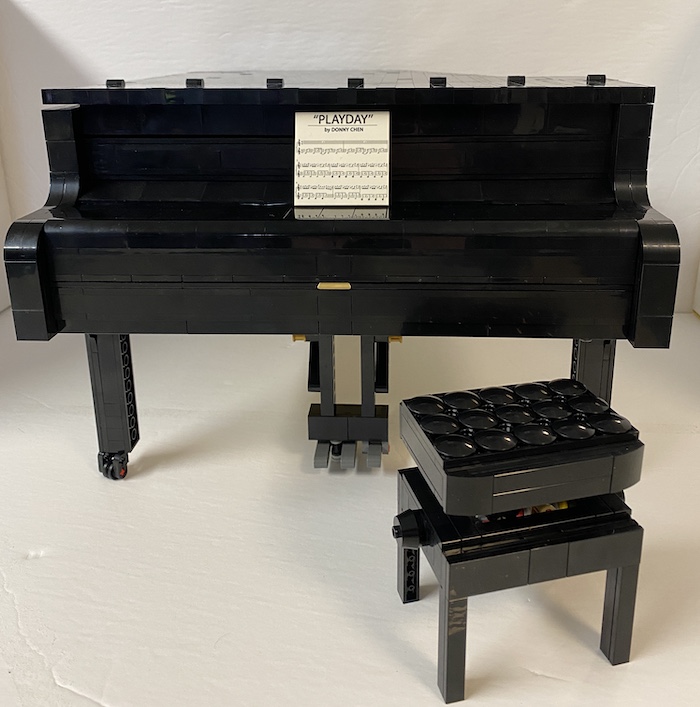
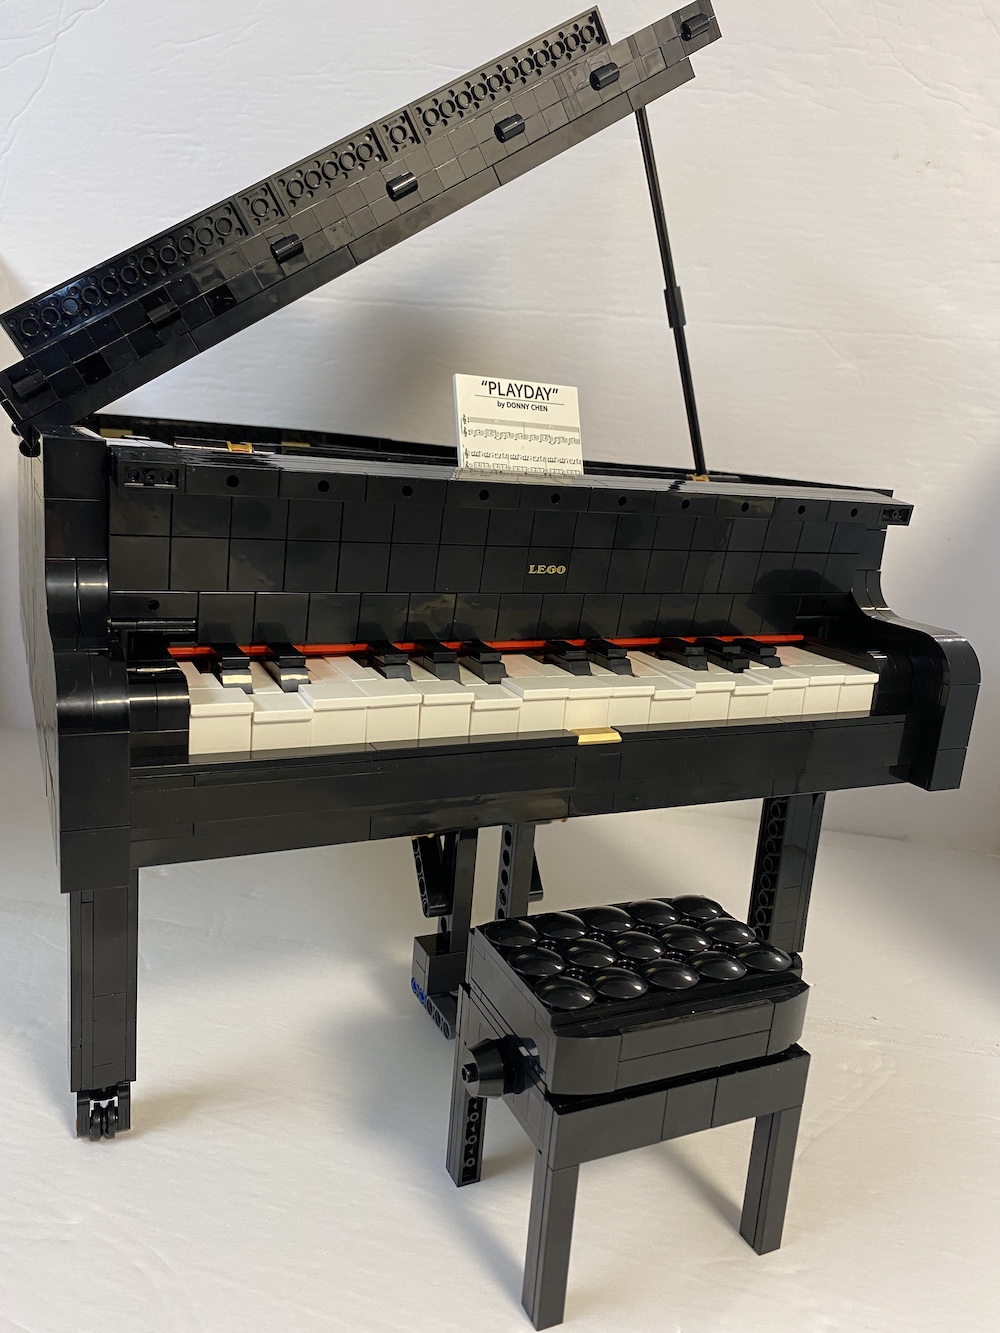
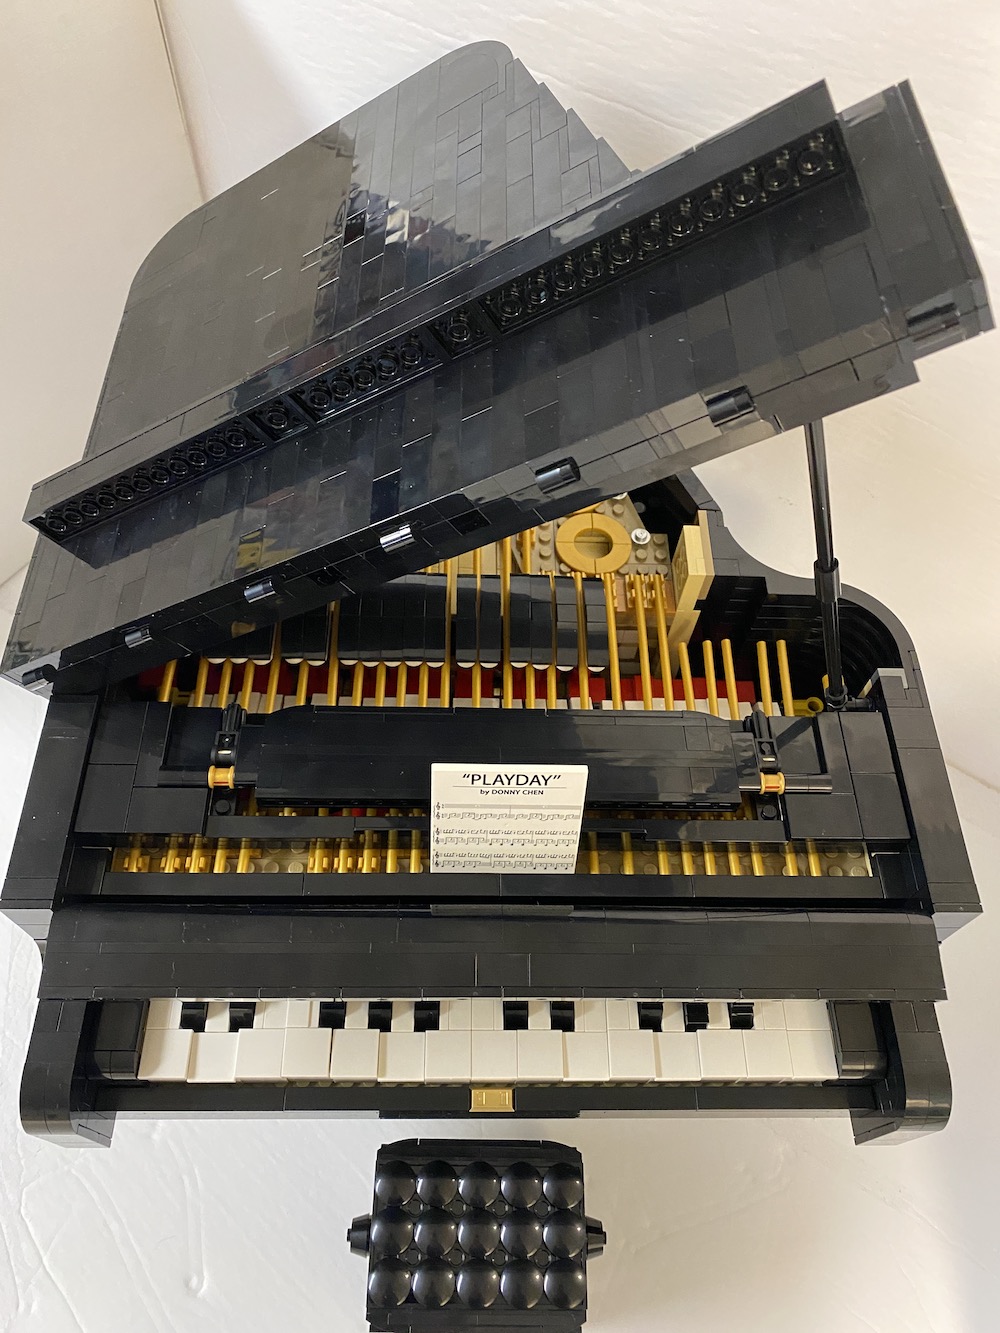
The top lid can be propped up just like a real grand piano. There's an opening fallboard and the piano legs are on wheels. There are three pedals on the grand piano – they are named, from left to right, the una corda, sostenuto, and damper pedal. The purpose of the pedals is to change the tone of the piano in some way. And the finishing touch is a 'height adjustable' bench.
Normally I am reviewing jigsaw puzzles but this time I am going to try something similar to jigsaw puzzles, because it has 3,662 pieces. It could be classified as a puzzle, just not a ‘jigsaw’ per say. That said, I will be assembling this project and posting it out. You are welcome to follow along in reading the progress report of this massive project. This post will contain the Intro and Section One completed.
I received this for my birthday and it was one of those impulsive gifts that I just HAD to have. I have always loved the black and white keys, even in jigsaw puzzles. But this 3D Lego is going to be one of the funnest and most creative piano models I have ever seen.
|
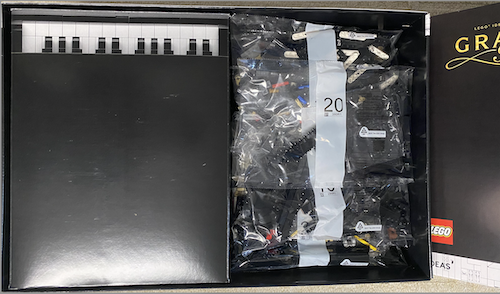
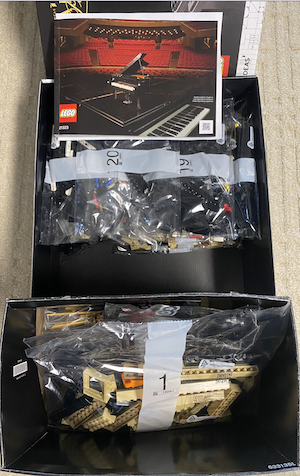
So it comes packaged in a rather large, heavy box, 13 pounds. Inside there are clear numbered bags of parts. Some bags have 2 of the same number and only a few are a single bag. Then most bags have a plastic bag of parts inside the larger bag. I am not sure what the purpose is for the bags to be separated in such a manner. Then about half of the numbered bags are inside a separate cardboard box which sits in the main box, while the other half numbered bags are sitting loose. |
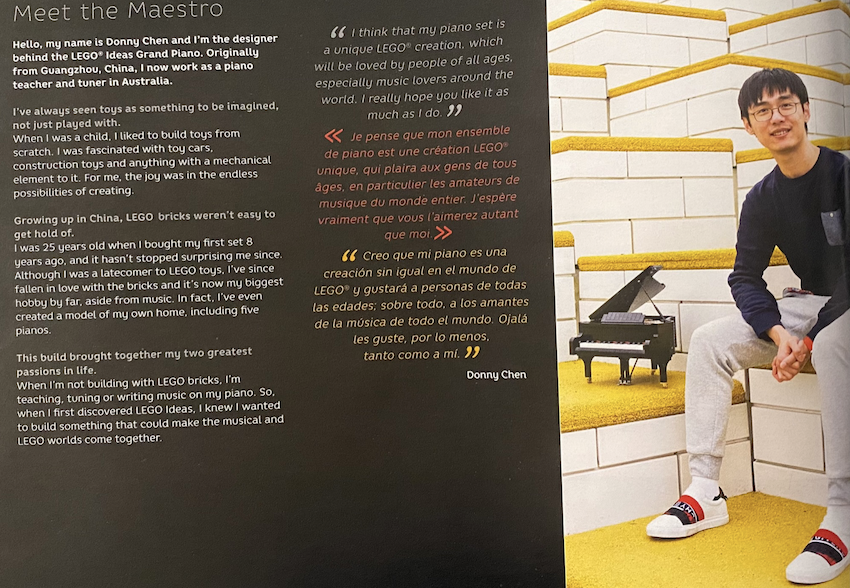
Below is the Creator of the Grand Piano, Donny Chen. There’s a write up about the whole process of this project in that section of pages within the Manual. It's a quick interesting read.
|
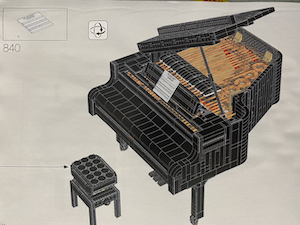
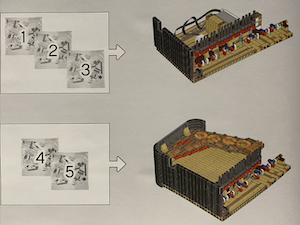
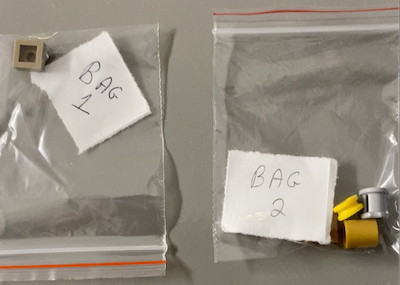
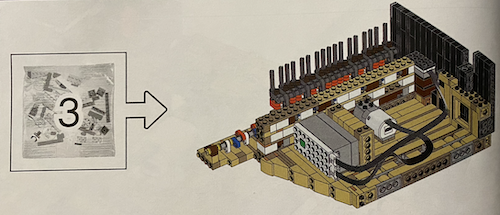
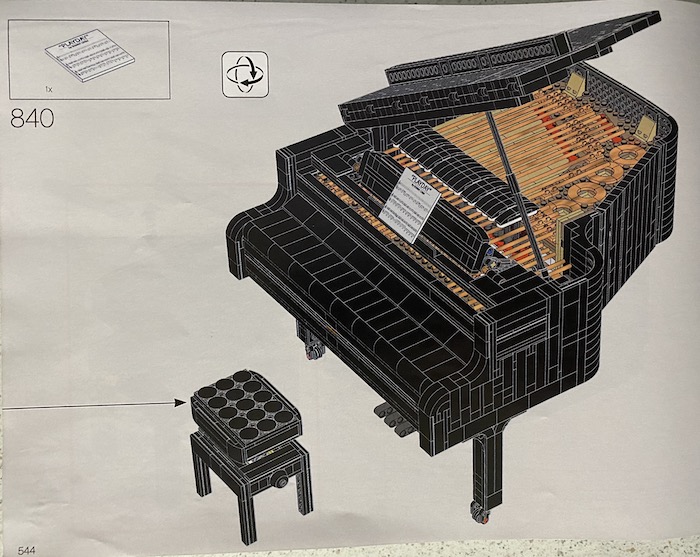
Section 840 (to the right) is the end goal. It is the completed 3,662 pieces assembled which includes the Piano bench. The following four images share the progress of assembly according to the Bag placement. So Bags 1,2 & 3 will complete the image the arrow is pointing to. |
|
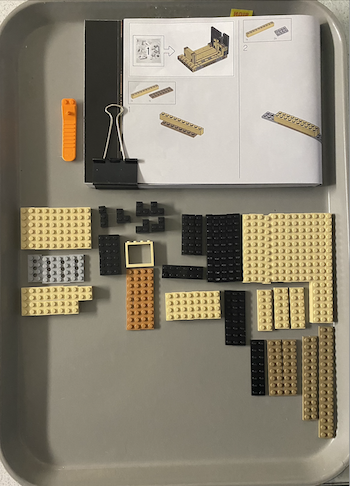
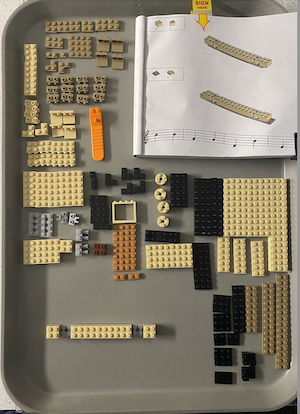
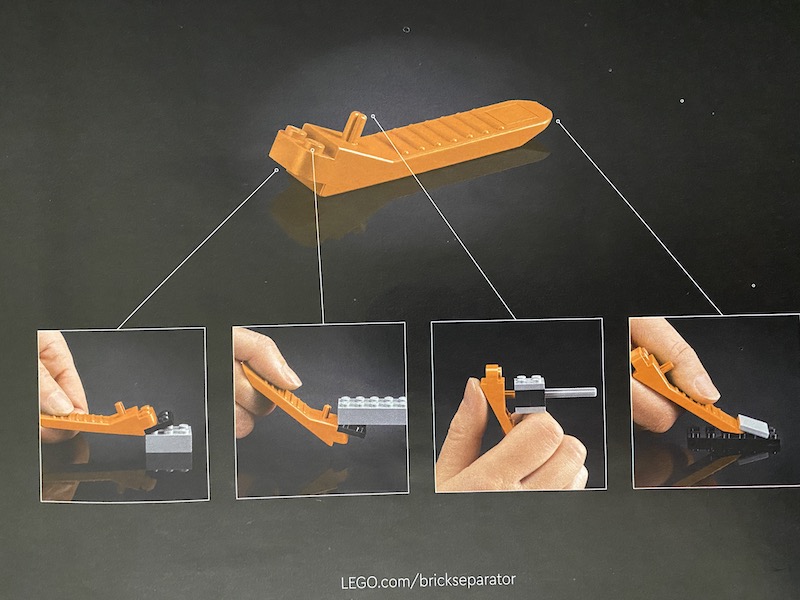
To the left is the Lego brick tool. You’ll see the demo on a different page below. Bag #1 had a bag of parts inside Bag 1 so you can see the added parts on the following 2 photos. Lego Grand Piano - Let this game begin...This is the beginning of the 3,662 pieces Lego Grand Piano. I have one of the old school cafeteria trays and it’s perfect for this project. There’s plenty of space to layout the pieces according to colours (much like a jigsaw puzzle) plus there’s also enough room for assembly. You will note that the manual sections show only images except where the APP is concerned. There is no text instructions. But don't let that stop you as it is very clear what pieces to assemble. Note how I keep the Manual with the current page up for tracking purposes. |
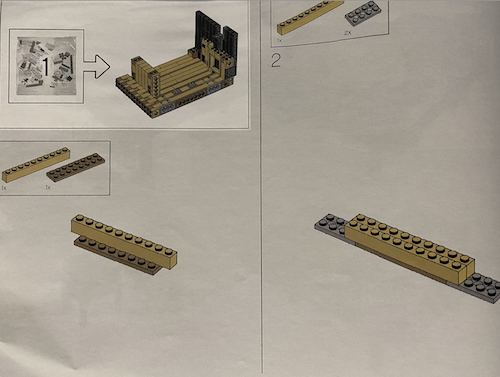
So as you can see where I start with Section One, that the little image in the upper left corner indicates what the finished Section One will look like. The first thing I needed to determine was the colour match- meaning, the colour match was not perfect for a couple of the colours. I had to stop and really figure out which pieces were which colour and after a few minutes I did. It was not too difficult to determine as the rest as the page shows the exact pieces that need placing to build upon each other. While that ‘colour-match take-off’ may have taken a few minutes of extra time, building the rest of the ‘pages’ started to move along quickly.
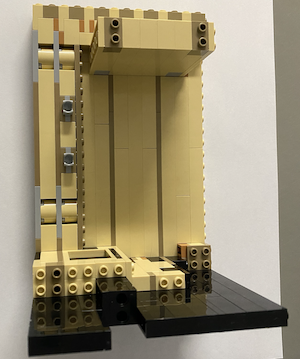
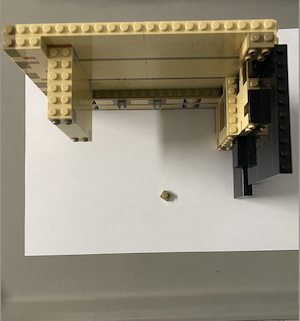
Here’s 2 views of the completed Section One. You can see there is an extra piece. I will place that in a little bag with a label on it in case it’s determined that I ‘somehow’ missed it.
Summary of Section One
As mentioned above, the manual shows only visual images to assemble the pieces. There are no text instructions except on some of the APP pages.
As I assembled page-by-page, I kept waiting for the complex sections to happen and I must admit, through this first section, there really was not any parts that I had to wrestle with. I don't want to say it's easy - I really focussed and double checked the assembled pieces because many are the same colour and you can easily lose track of the building area you are working on. I was double checking as I went along and if I had to rework a few pieces, I removed the pieces from the current page, kept them separate from the previous page, made my corrections on from the previous page, then proceeded forward. I felt it was very important to keep the parts working with the pages I was currently assembling. I also thought it would be best to complete one section per sitting so as to not get confused which Page I was assembling. And also during the assembly, I made sure I could see only the current page I was working on by keeping a black clip attached to the 'working' page as my marker. I felt it was VERY important to keep the assembly process very organized because there are a lot of similar pieces and distractions could become big mistakes quickly. Luckily for me, I did not have any major reworks - I knew it would be quite daunting to correct IF I did.
All that said, I discovered that, like jigsaw puzzles, there was a deep focus of attention required during the sessions which is comparable to the same requirements as a challenging puzzle -the difference was, building the Lego bricks was easier even though it required the same level of focus.
So that completes the Intro and Section One. The next Update may contain more than once section at a time. But before we move onto that, I would like to share the contents of the manual as it will help introduce the layout for the project going forward.
Lego Grand Piano - Section Two
|
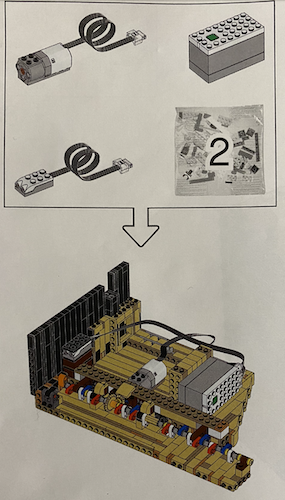
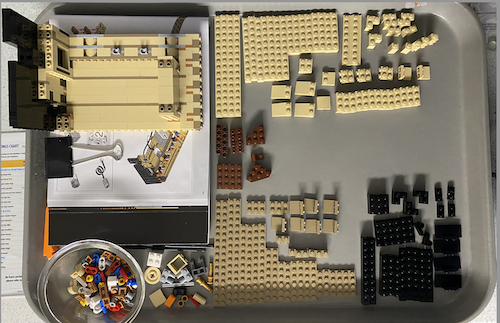
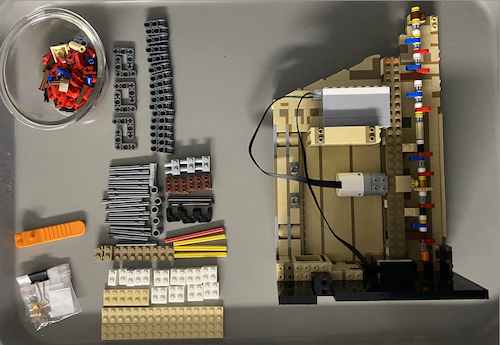
You can see to the left what the completed section will look like. A big step happens with the batteries and a test to ensure the batteries are in tact and functional. The image below shows how I have laid out the Section Two pieces all colour coordinated with the Section One sitting on the assembly manual. I found the process worked quite well using this process so I will continue on with Section Two in the same manner, doing page to page. It is not difficult to do. The visual instructions work well however I am waiting for the assembly to get more complex. I am being VERY careful to follow the pages specifically as I do not want any rework. | |
|
To the right, you can see that there are extra pieces. I will bag up the extras according to their Sections. There's a video below that shows the battery installed. |
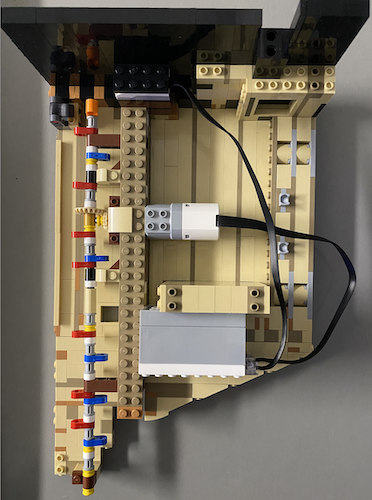
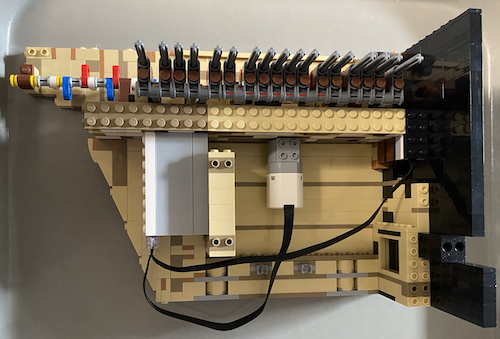
Now to the left, you can see I have completed using all the Section Two Pieces onto the project. One tricky area is the red/blue/yellow/white 'gear-shaft' that has the ability to rotate which connects to the piano keys lifter. Also, the battery 'pack' is connected to two areas. The one cable runs from the battery pack and connects to the 'gear-shaft' to rotate it in turn lifts the keys up/down. The second cable that runs from the batter pack connects the other end which will be seen from that side of the inner piano - it is the on/off light indicator. The battery and components will be tested at the end of Section Three. See the Intro Section below for more details. |
Lego Grand Piano Section Three
|
Above is the completed Schematic for Section Three. The image to the right shows all the pieces that will get us there. Adding these pieces to Section Two might seem tricky but as long as I focused on each specific page as I built piece by pieces, then connect it to the main project, the process was going smoothly. | |
|
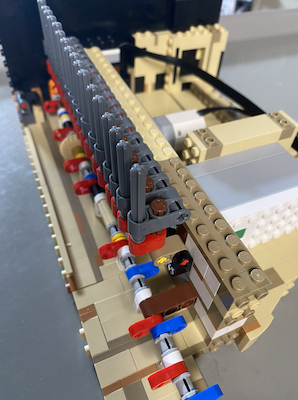
To left and the above image are the same completed Section Three but I wanted to show how the 'piano-key-grey-pillars' were mounted onto the gear shaft. |
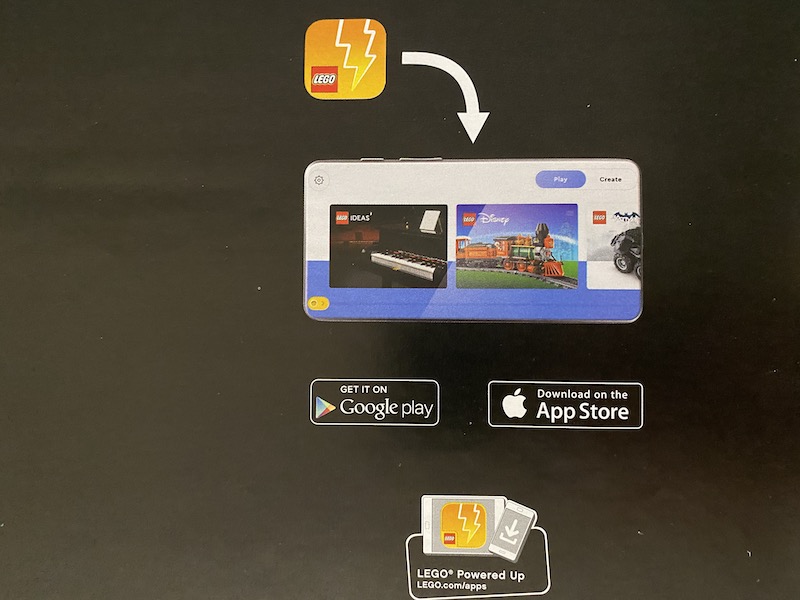
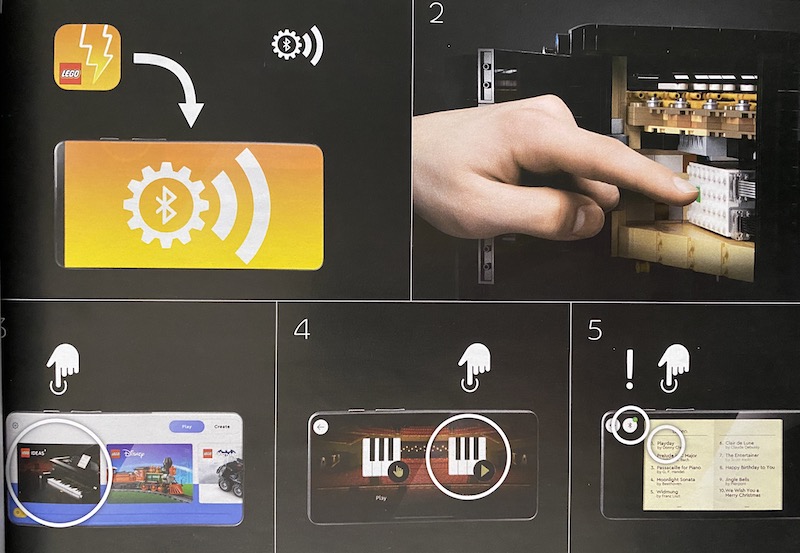
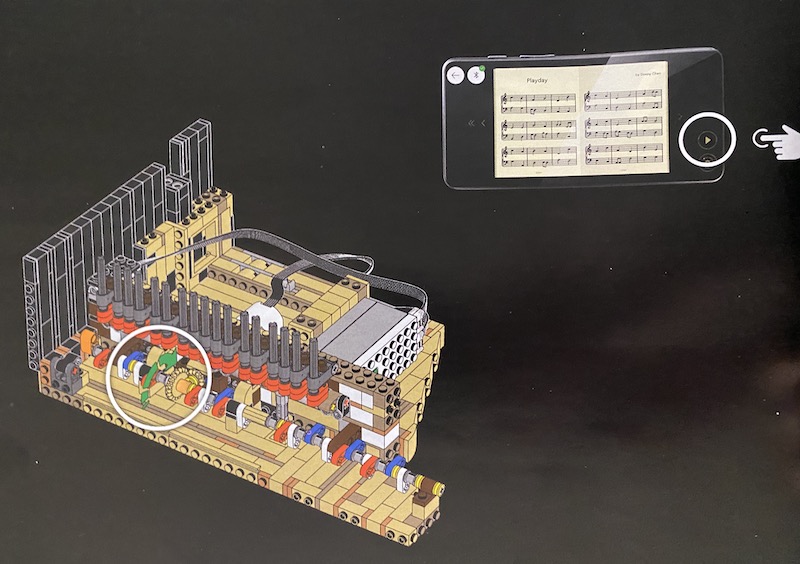
So Page 109, in the assembly manual and a page in the 'Intro' section, indicates its time to download the Lego APP onto your device (phone/tablet). This time, the test is going to see IF the gear shaft is connected correctly to move the piano-keys via the grey-piano-pillars'. So ensure the APP is loaded correctly and you have selected the Grand Piano project. When the APP is connected to the battery pack, the light will come on and when a song is selected, the piano gear will turn about 180 degrees and the piano keys will 'set themselves'.
Note the following: (Once the APP is downloaded, it will show the APP for several Creatives so simply scroll to the Piano APP - it’s easy to see it. You turn the battery box on by pushing the green button. The APP will sync with the battery box and you will see a white flashing light to know that it’s working. At that point, you will be able to hear the Piano music you select, play coming from the APP. Now when it came to stop the APP from playing, I could not locate the ‘stop’ button/link any where so I ended up turning my iphone off. That stopped the light on the White Lego battery box. When I turned my phone back on, my phone was fine and the APP was turned off. I never did find a ‘fix’ for that yet.)
Lego Grand Piano Section Four
|
Section Four consists of building the second level of casing that will be part of the closure for the turning gear mechanism and the battery box on the bottom level. The image to the left shows the completion of Section Four while the image below-left shows the parts sorted out in order and bottom-right shows the work-in-progress tray set up orderly. |
 |
 |
 |
|
Looking at the image to the right, you can see 'level-1' or the bottom row of lego, then the black-computer-ribbon which encases the battery box. The next level starts with the square-grey lego pieces shown in the tray above. It is part of the 'base' for the 2nd level. You can see the lego 'sheets' below that will take on the form of the piano's 2nd level.  |
 The 2nd level (image to the left) gets covered up with the Lego pieces that have a flat smooth surface. After that, another level of lego is added only to the one side. Next, this newly built section will be inserted into place onto the combined Sections 1-2-3. |
 |
 Shown in the image above is the overhead view of the completed sections 1-4. A 6" ruler is added to assist with the size visually. |
Lego Grand Piano Section Five
|
In Section Five, you can see in the image to the right what the outcome goal will look like. Once again, in the image below, you can see an overhead of my work-in-progress on the tray and the sorted pieces for the Section five.  |
 There's some interesting parts like dowels and curved pieces. Basically what happens is we build the entire rounded 'outside-wall' for the back of the piano as shown below in the next two images. |
 Shown here above and the two images to the right are different views. What you do not see is how there is a 'cage' that has a 'window-slot' that is required for internal 'fitting' to the inner-works. The lego pieces layout is very intricate and I can't even imaging creating this model - I am constantly amazed at what I am seeing and how totally simplified it all is! |
There are a LOT of steps to arrive at placing all the Lego pieces to fill in those sections. It requires your full attention as you are assembling because it would be difficult to locate an error.   |
  Also, in Section Five, is the process of the workings towards another layer of Lego which is unknown to me at this time, however, I can say that this unit is getting some weight to it. Stayed tuned for the next Sections. |
But Section Five does not end there. The back 'panel' is mounted to Sections 1-4 using the dowels and other lego connectors. The image to the left shows the 'before' and the two images under are the completed sections of 1-5 now.  |
Lego Grand Piano Section Six
  |
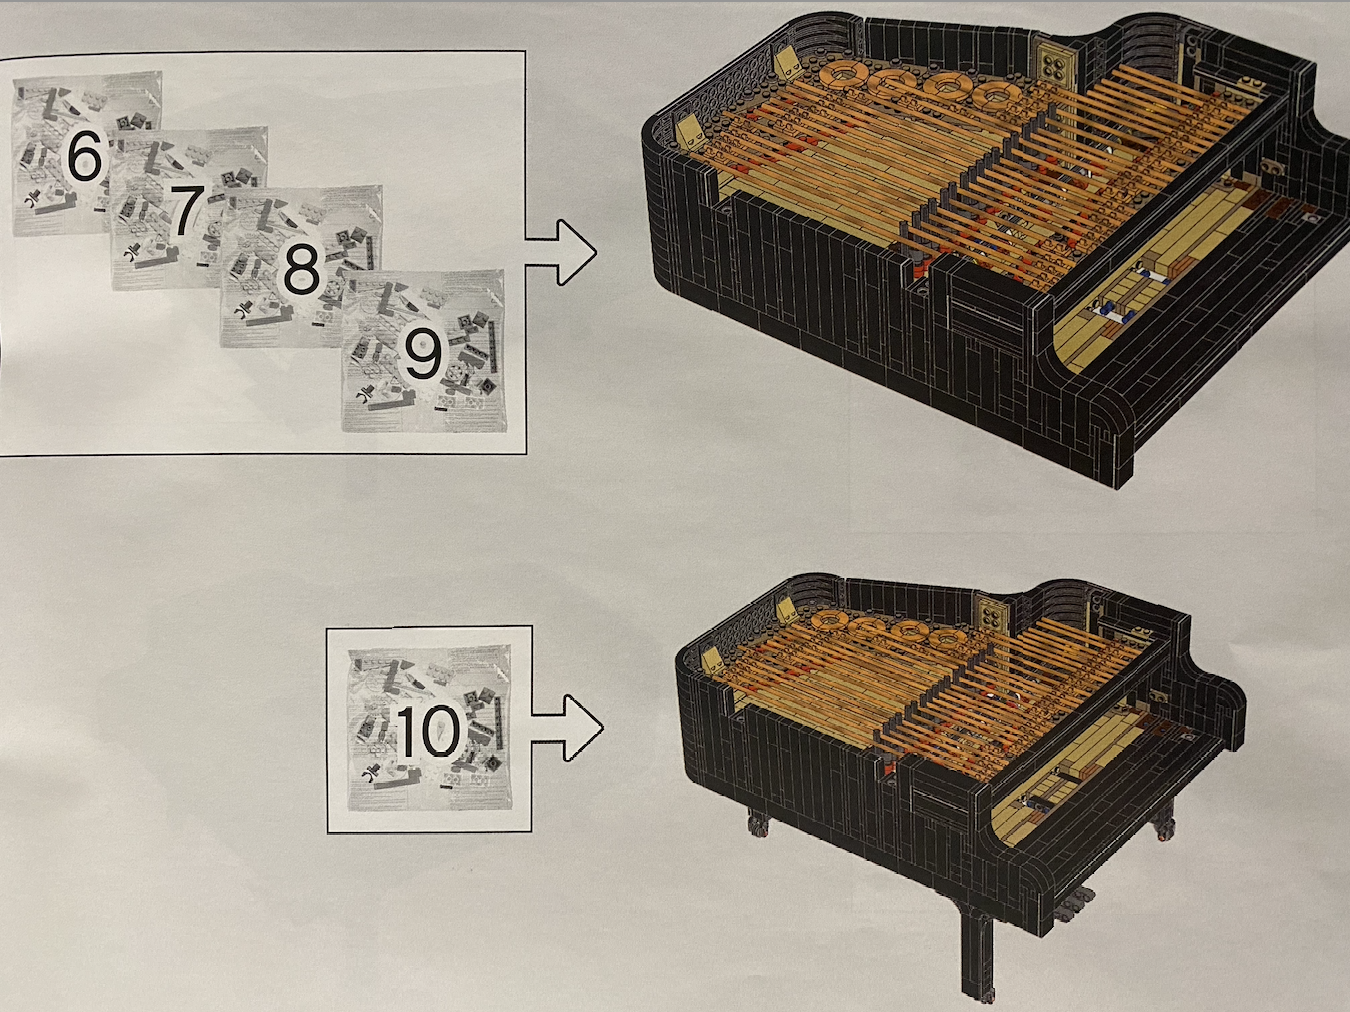
The goal here is to build up the upper front end that will become associated to the working fall board or key cover that can reopened and closed. It will take Sections 6-7-8-9 to complete it. Once again I continuously layout the pieces according to colours and shapes, much like a puzzle. In this Section 6, I am only building the outside 'cage' and it seems quite large/wide. It is not difficult and it goes rather quickly. I have added a couple of angle views below.  |
 |
 |
Lego Grand Piano Section Seven
 |
Section 7 is the easiest thus far as I am simply building black pieces onto Section 6. You can see the small amount of pieces in the tray below and note that I have the main section of Sections 1-5, then building section 7 onto section 6. |
 |
 |
Lego Grand Piano Section Eight
 Below, Sections 1-5 are on the right and Section 6 & 7 is beside it on the left. They will become attached in Section 8. The bags of pieces are laid out on the tray in colour coordinated areas. There are several new shaped pieces this time. |
Section 8 focuses on the piano string/keys. For the first time, there are dowel-parts that have not been used yet and the gold-coloured 'strings' that start the building of the piano keys as seen below.  |
 |
 |
 |
After going through the process of 22 pages in the manual, the following results are shown to the left and a sideways view of Sections 1 to 7 are joined together and the piano key strings are set in place.  |
Lego Grand Piano Section Nine
The next Section 9 consists of assembling the 'door' that gives access to the battery component to turn the music APP on and off. For some reason I did not get close up images or I cannot locate them however, this section is more visible in future images.
 |
 |
That said, once the door section gets complete, it's time to do another test to determine that the music plays through the APP and the keys are free to make the rotation by the battery operated gear-wheel. My test proved positive! I honestly do not know what I would have done IF it didn't... LOL
 |
 |
Lego Grand Piano Section Ten
So Section 10 is going to assemble and attach the piano legs on real rollers and the damper pedals. I also thought it would be interesting to show how the pieces/packets arrive. I am not certain why there are separate bags with certain parts because I never really felt any usage for that purpose at all. In my review, I always emptied the bags onto the tray and organized the pieces according to colour/shapes. Doing that did not seem to interrupt any process as each page in the manual shows you which pieces to assemble in a chronological order. I felt that grouping the pieces according to shapes a colours would help me to easily pick out the required pieces. IF I did not organize the pieces, I would have been picking through the bags as shown below.
 |
 |
 |
I felt a real progress happening when I completed Section 10 because now the piano was standing on legs and the Damper pedals were attached. Assembling this section was a tad different but not difficult at all. I have added a few photos that shows the front end of the piano on its legs with the turning wheels. There's a really nice closeup of the damper pedal below and at this point I am practically beaming!!! SO loving this whole process! |
 |
 |

Lego Grand Piano Section Eleven
Now things are starting to get really exciting as the process still remains fairly simplified. But seeing what the long term goal for Section 11 looks like, it seems a tad intimidating. The amount of pieces seemed to stay roughly the same with some different odd pieces.
 |
 |
 |
So 22 pages of piece-by-pieces, I meticulously followed the instructions. I wouldn't dare make a mistake at this point as I would not be able to recover from it. However, the 'set-up' system remained fairly doable. I was 1000% focused - I do mean one thousand percent! But it was not so difficult and I had nothing to be SO concerned about. As long as each page is followed very carefully, it's doable. That said, I was now in the process of building the piano keyboard which was thrilling.  |
Lego Grand Piano Section Twelve
  |
Section 12 continues to build the black and white beauties (I mean the keys). There was a the front end of the keys completed in the last section and now the back end of the keys are built using the white lego pieces. There's more different pieces used which make the key lift up and down......sooooo cool! I'll admit, I was still in 'high-focus-mode' while assembling this and loved seeing it come together!  |
Lego Grand Piano Section Thirteen
Here the piano keyboard continues to get assembled. Actually at this point I am building the 3rd keyboard section and at the end of the process, all three sections get joined up together. They are simply joined together by little dowels that connect to the inner sides as seen below - very simple!
 |
 |
 |
 |
 |
 |
 |
Lego Grand Piano Section Fourteen
|
Just when I thought I was finished the keyboard, Section 14 assembles the fourth section. See how the bags arrive in packets and there are some loose odd pieces that sit open in the box like the cream coloured lego sheet to the right. So I continue to line up the pieces on the tray. The piano is too big for the tray now and it is getting some weight to it too. As you can see below, I assembled the 4th keyboard section then attached it to the other 3 segments that are already in place. |
 |
 |
 |

Lego Grand Piano Section Fifteen
The end goal for Section 15 is to insert the keyboard carriage into the piano. I do not have an image of the pieces in Section 15 sorted out on the tray but trust when I say I did because that was the procedure I maintained throughout the course of this project.
 |
 |
Now that the piano carriage is complete at this point, it's time to assemble the pieces that will assist in joining or inserting the 'Removable keyboard with 25 independent working keys, connected to their own hammer'. Using the pieces from the bags, there is yet one more keyboard section that uses dowels to join the final length of the keyboard. Then an outer-edge rail is built with the other pieces and it is the part that will make the keyboard removable from the inside-front of the internal piano. Once again, dowels are used that will make the final connection.
 |
 |
 Note the white keys above then compare to the white keys below to see the difference of how the black rail hold the outside of the keyboard. Note the bronze lego in the centre. |
 |
 |
 |
Lego Grand Piano Section Sixteen
Section 16 is going to be fun because we build the working fall board or key cover which can be opened and closed, protecting the keys. Looking below the first 2 images you can see the pieces laid out on the tray, you can see the unique pieces that will be used to build the cover. AND it will also show the red keyboard line which gives the piano keyboard some realistic enhancement - love it! The last three images shows the fall board in motion from the upright position, to semi-closed and then completely closed. At this point, I'm getting a real sense of completion. Keep in mind, all this time there is no textual instructions - it's ALL based on following a page-by-page assembly process using images only!
NOTE: The inside Fall aboard has the 'label' LEGO in gold text.
 |
 |
 |
 |
 |
 |
Lego Grand Piano Section Seventeen
Now, getting into Section 17, I can feel the end is in sight and I am getting more excited to see this project through quicker to completion. I have estimated that I can get through a section in about 45 minutes but that is me sorting the pieces out of the plastic bags and onto the tray as shown below.
 |
 |
 |
 |
Once the sorting is done above, you can see dowels are in the picture again. So shown by the red arrows below, the 2 specific areas are the piano bar that holds up the piano lid and the black parts that cover over the white keys.
 |
 |
Lego Grand Piano Section Eighteen
With a good portion of the piano assembled, I feel like I am on the downhill end so I am excited to see that Section 18 is starting the assembly of the piano lid. It is a working piano lid which can be opened and folded back when the lid is raised. Sounds complicated to build but I was pleasantly surprised at how well the process went.
There is mostly black pieces in this section with some funky different ones. I've shared three different views of the first section of the piano lid below and one shows the orange-item to lift the lid to who the bendable lid.
 |
 |
 |
 |
 |
 |
Lego Grand Piano Section Nineteen
 |
In Section 19, the piano lid gets continued to be built. Once again, the parts are mostly black with some more funky pieces. Once this section is completed the lid becomes quite large but that is to cover the entire piano top that folds. This section went together very quickly. Below is some visuals of the piano lid that is almost complete. |
 |
  |

Lego Grand Piano Section Twenty
Once again, the colours of the pieces are all black and look fairly straight forward other than the fact that there are not as many pieces as the other sections. This is because it is building the connector for the piano lit to the piano itself.
 |
 |
 |
 |
The image to the left-below shows the completed piano lid and the right-below shows where the connectors are going to attach. I have added the red arrows to point it out exactly where on the piano the connection is. Then the image that follows below that is the close up view of the actual connection to the piano - SO AWESOME!
 |
 |
Lego Grand Piano Section Twenty-One
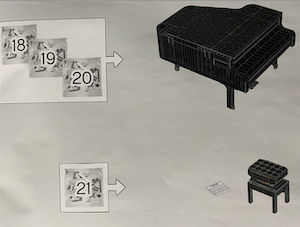
The very last Section 21 (finally) is to complete the piano stool which can be raised or lowered - who would've thought! I am pretty pumped to complete this until I look at all the pieces, some of which are rather odd looking and the steps in the images looks intimidating. Obviously I forge forward being extra cautious with my steps because I know how easily I can overlook an error from the previously assemble pieces - believe me, it's VERY easy to do so be cautious.
I muddle my way through the 17 pages of diagrams and make a couple of minor placements but I do figure out was the exact placement is supposed to be. It's the adjustable-height gear that rattles me and has been the most complex of sections to complete. I am grateful it is not any more complex that this - that's for sure!
LEGO Grand Piano Demo with Sound - watch video
Lego Grand Piano Completed
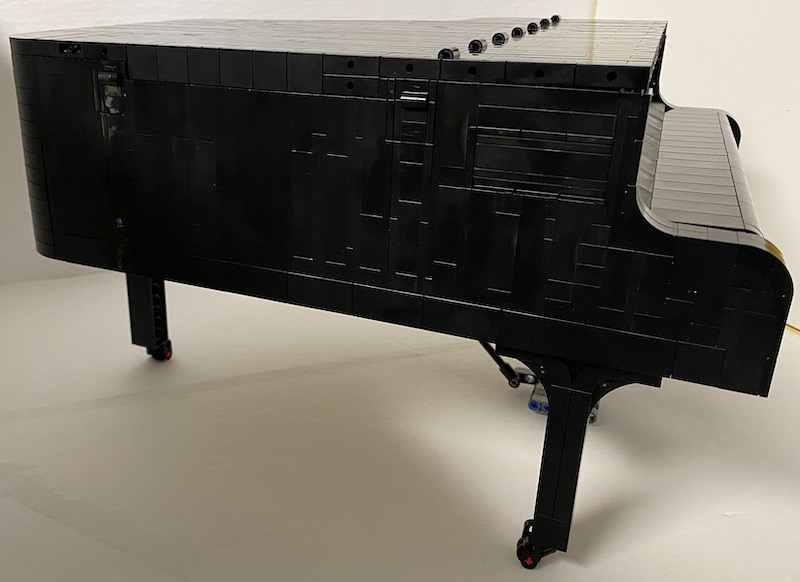
First I am going to show the completed project in all it's glory. I loved this experience and the outcome of the model. It's shiny, sturdy, well put together and a terrific conversation piece. I likely could have completed it in 25 hours IF I did not stop to organize the pieces and take the photos along the way. Of course it is time consuming to write up this review as well. So my time estimated (does not include writing this review) to assemble this is 40 hours. Does that make it worth the price I paid of $500.00? Most people will say no but since I have it now, it will be a keepsake to pass on down to the next generation.
Don't stop after seeing all the images in this section below because there are still 2 more sections after that!
Lego Grand Piano - Flaws
Before I get into the flaws, I have saved, bagged and labelled the left-over pieces from each section. To determine IF I missed adding the pieces where they belonged, I counted the extra piece in 'said' bag to ensure it was in fact an extra. So I proved to myself it was an extra.

The next two photos below are showing what appears to be a missing finishing piece on each side of the keyboard backboard.
 ABOVE- Missing a finishing piece on right side under the piano lid on the right side. |
BELOW- Missing a finishing piece on right side under the piano lid on the left side.  |
 |
 |
|
ABOVE -The completed side with no missing pieces. |
ABOVE-The completed side with a missing piece. |
The above two images are showing how one side of the piano, on the outside, close to the lid connection area is missing only one missing piece where the other lid connection area has a finishing piece to it.
Lego Grand Piano Manual
Highlights with in the Manual that are related to the model and APP. Starting with the Front and back cover which is very plain on the back.
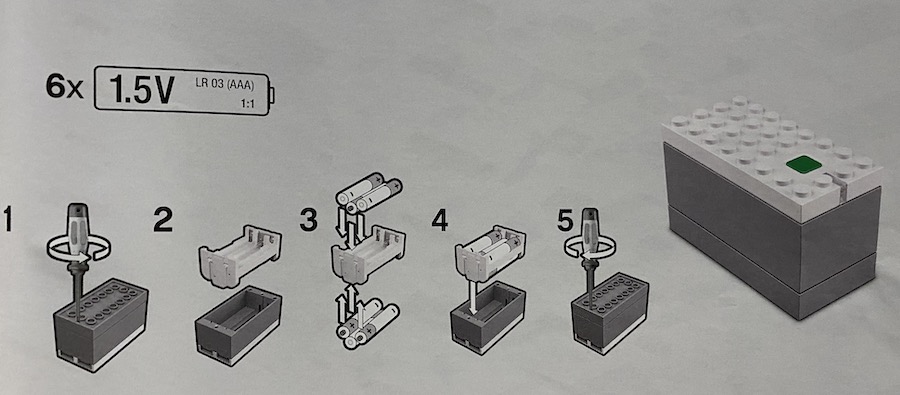
This image below shows you need 6 - 1.5 volt batteries or triple ‘AAA’s’ NOT included. It shows the steps on how to load the batteries into the power box.
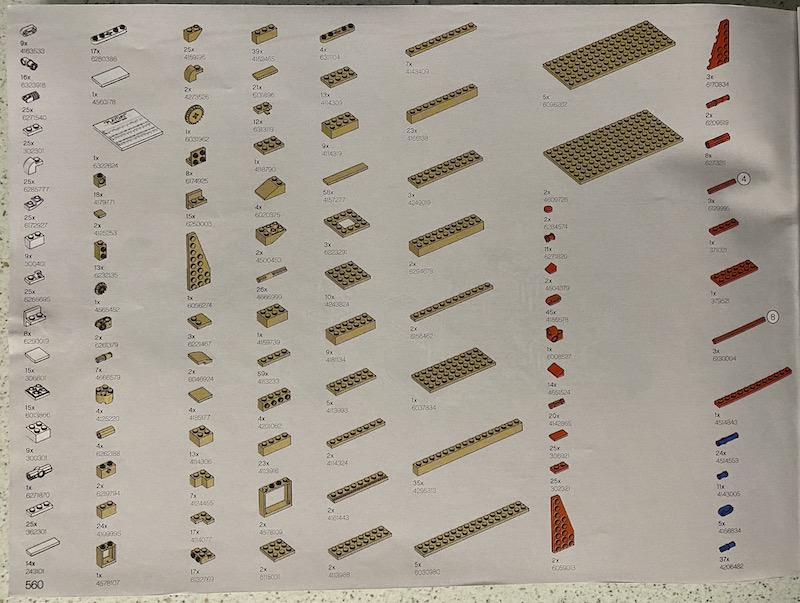
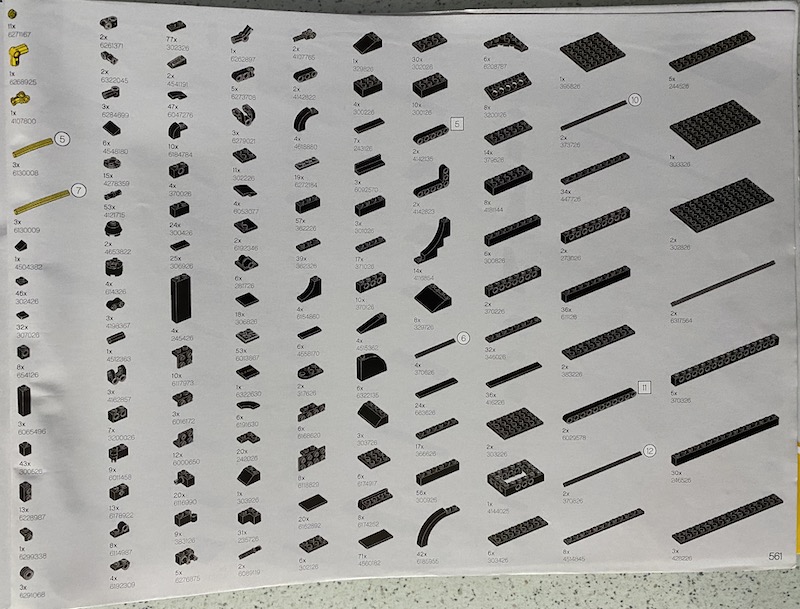
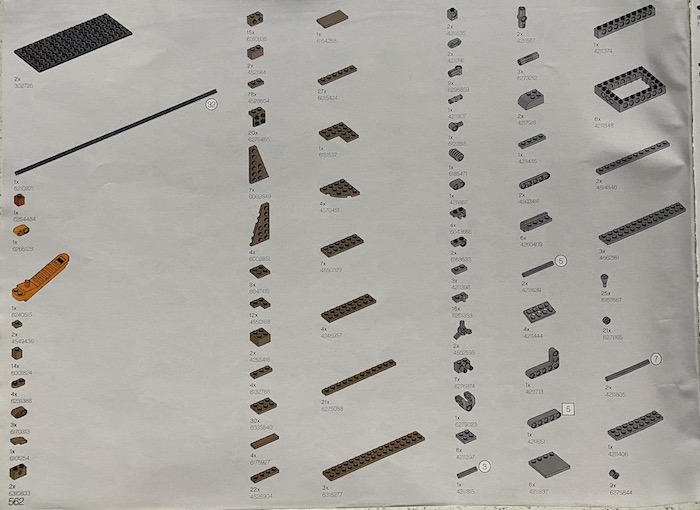
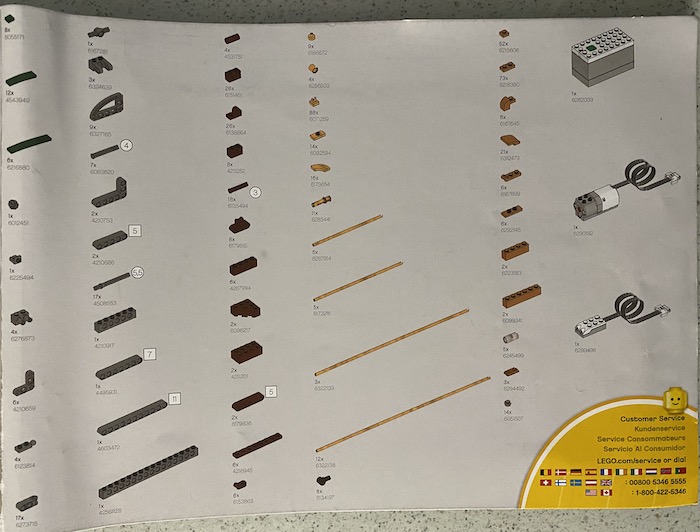
Starting on Page 560, every piece with quantities is shown. There are 4 pages of parts. There will be further notes on the parts in a future section.
Here’s 2 pages that share larger sections assembled that build up the features of the piano.
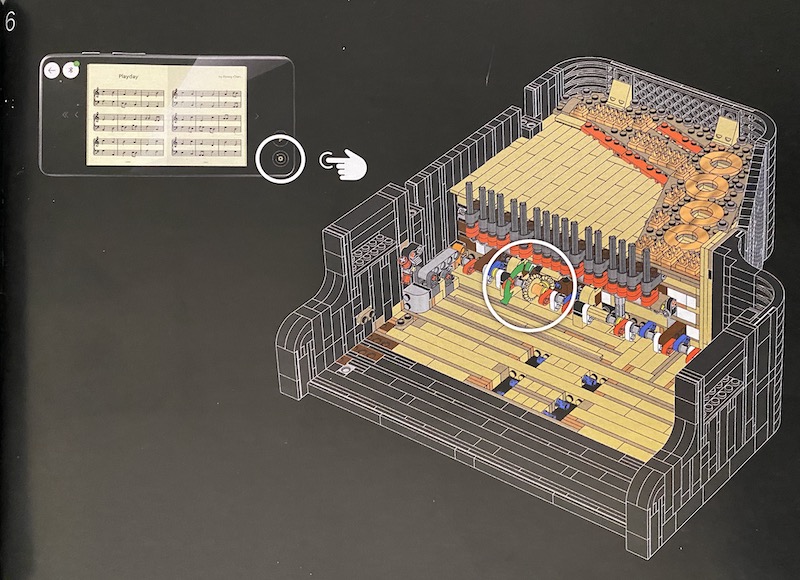
After a few Sections are completed, the battery box will be in place and ready for the first APP test. It’s time to download the APP onto your device (phone/tablet). Once the APP is downloaded, it will show the APP for several Creatives so simply scroll to the Piano APP - it’s easy to see it. You turn the battery box on by pushing the green button. The APP will sync with the battery box and you will see a white flashing light to know that it’s working. At that point, you will be able to hear the Piano music you select, play coming from the APP. Now when it came to stop the APP from playing, I could not locate the ‘stop’ button/link any where so I ended up turning my iphone off. That stopped the light on the White Lego battery box. When I turned my phone back on, my phone was fine and the APP was turned off. I never did find a ‘fix’ for that yet.
Note, this is on page 544 in the manual and assembly section 840. It shows the assembled piano, the bench and the music sheet in place.
This is a good DEMO for the Lego Brick Separator tool - chances are you will use it as I did a few times.
|
At about half way of the assembly process, there will be a 2nd test to ensure the ‘keyboard wheel’ will turn by using the APP. It turns about 180 degrees, which basically resets the piano keys on the front keyboard. I had no issues with that and it worked quite well however I still had the same problems of turning off the APP as I did with the first APP test. | |
Assembly Process Sections 1 - 21
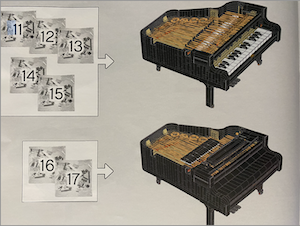
The following is the 'increments' of sections from One to Twenty-one. You can reference these images to the completed sections above which helps follows the assembly process.
 |
 |
 |
 |
Now that you have seen a good portion of the manual, my set up and Section one completed, you should be able to accomplish this one much quite comfortably. There are many other Lego creatives below if you are interested. CLICK HERE
LEGO Grand Piano Assembly and Review - full Youtube Video
- Best Quality Jigsaw Puzzles
- 43 Best Jigsaw Puzzle Brands
- 5 Best Jigsaw Puzzle Lights
- 11 Best Jigsaw Puzzle Tables
- 23 Best Jigsaw Puzzle Mats
- 85 Best Shaped Jigsaw Puzzles
- 29 Disney Villainous Jigsaw Puzzles
- Best Jigsaw Puzzles Scoops
- Best Jigsaw Puzzle Glue
- No Glue Method for Puzzles
- 115 Cobble Hill Jigsaw Puzzles
- 33 JaCaRou Jigsaw Puzzles
- 9 WerkShoppe Jigsaw Puzzles
- 5 Grateful House Jigsaw Puzzles
- 95 Eurographics Jigsaw Puzzles
- 7 Hennessy Jigsaw Puzzles
- 11 Ceaco Jigsaw Puzzles
- 29 Cloudberries Jigsaw Puzzles
- 2 Wentworth Jigsaw Puzzles
- _______Advertisement_______
We have collected a massive list of jigsaw puzzles in numerous categories on our Amazon Store link. It's a quick way to browse most current puzzles and/or specific seasons, accessories and themes. Makes for a terrific one-stop jigsaw puzzle gift giving shopping centre. CLICK HERE
You may enjoy these Lego Ideas - Click here
- Home
- What's New
- Lego-Grand-Piano


